12V Van & 4WD System: Plan Your DIY Power Setup
Work out what you need to run, how to keep it charged, and which parts make a safe, reliable 12V system for your van or 4WD.
What a planned 12V system can do
A properly planned 12V auxiliary system lets you run a fridge, lights, water pump, phone and laptop charging, and other camping gear without draining your start battery. It keeps food cold on long drives, lets you stay longer at a campsite without mains power, and gives you a reliable power source when you're away from town.
There is no single setup that suits everyone. The right system depends on the appliances you want to run, how much energy they use each day, your vehicle, the space you have to install everything, and your budget. This page walks you through the planning steps and points you to our detailed guides along the way.
Safety first: batteries can deliver very high current, and 240V AC work is strictly for licensed electricians. Read the safety section before you start.
Plan your system
← Back to TopicsAnswer these questions before you buy anything. Each answer shapes the next one.
- What will you power? List every appliance and device: fridge, lights, pump, fans, chargers, and anything else.
- How much energy will they use each day? Estimate the watts each item draws and how many hours it runs. See Calculate and size the system below.
- What battery capacity suits you? Your daily use, how many days you want to last without charging, and the battery type all matter. Start with Lithium vs AGM Battery for Camping and Best 100Ah Lithium Battery for a Caravan.
- How will you recharge it? From the alternator while driving, from solar, from 240V AC mains at a powered site, or a mix. See What Size DC-DC Charger Do I Need?
- Is solar suitable for how you travel? Solar suits longer stays and sunny camps, and is less useful if you drive most days. See Solar Blanket vs Rigid Solar Panel.
- Do you need an inverter? Only if you need to run 240V AC appliances. Many people can avoid one by choosing 12V or USB-powered gear.
- What space and conditions apply? Think about where the battery and parts will mount, heat, dust, water, vibration, ventilation, and access for checking and maintenance. If space is tight, see Best Slim Lithium Battery to Fit Under a Seat.
Not sure if a DIY build is right for you? Compare the options in Power Station vs DIY Battery Box.
Understand the components
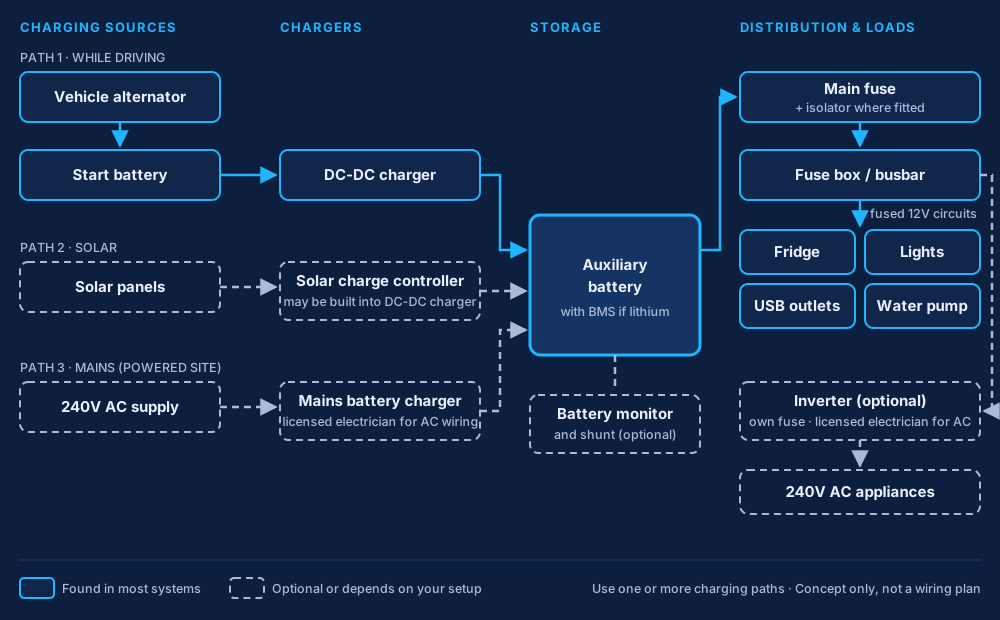
← Back to TopicsNot every system needs every part. A simple setup might be a battery, a DC-DC charger, fuses, cable and a fuse box. Larger setups add solar, a battery monitor, an inverter or mains charging. Here is what each part does.
Usually essential
- Auxiliary battery (and BMS for lithium): stores the energy that runs your gear, separate from the start battery. Lithium batteries have a battery management system (BMS) that protects the cells. See Lithium Batteries.
- Charging source: at least one way to recharge the battery. In most vehicles this is a DC-DC charger fed from the alternator. See DC-DC Chargers & Dual Battery Setups.
- Fuses and circuit breakers: protect each cable from overheating if there is a fault. Every positive cable from a battery needs protection close to the battery. See the 12V Cable and Fuse Size Guide.
- Cables, connectors, crimped lugs and terminals: carry current safely between parts. Size, quality and good crimps all matter. See the First 12V Install Tool Kit for Beginners.
- Distribution (fuse box or busbars): a fuse box feeds your individual 12V circuits, and busbars join multiple cables neatly in larger systems.
Depends on your installation
- Solar panels: add charging when you're parked. See Solar Panels.
- Solar charge controller: controls charging from solar panels into the battery. Many DC-DC chargers have one built in (often called an MPPT solar input), otherwise it is a separate unit. A dedicated guide is planned.
- Battery isolator or switch: lets you safely disconnect the battery for maintenance, storage or an emergency.
- Earthing and bonding: solid negative connections between the battery, charger and loads. Many installers run a dedicated negative cable rather than relying only on the chassis. Follow your equipment manuals. See the Dual Battery Wiring Diagram for a 4WD.
Optional
- Battery monitor and shunt: measures current in and out so you can see how much energy is left. Very useful, but the system works without one. A dedicated guide is planned.
- Inverter or inverter/charger: makes 240V AC from your battery for appliances that need it. An inverter/charger also charges from mains. These involve 240V AC and need special care (see Safety). A dedicated guide is planned.
- Shore-power (mains) charging: charges the battery from 240V AC at a powered site or at home, using a suitable battery charger. A dedicated guide is planned.
How they work together
Energy comes in from your charging sources (alternator through a DC-DC charger, solar through a charge controller, or mains through a charger), goes into the auxiliary battery, and flows out through fuses and a fuse box or busbar to your appliances. A monitor tells you what's happening, and an isolator lets you switch it all off safely. Each cable is protected by a fuse or breaker sized for that cable.
Wiring and electrical protection
← Back to TopicsGood wiring is what makes a system safe and reliable. The key areas are:
- Cable sizing: the cable must carry the current without overheating.
- Voltage drop: long or thin cables lose voltage, which can stop chargers and fridges working properly.
- Fuse selection and circuit protection: the fuse protects the cable, so it is chosen to suit the cable, and fitted as close to the battery as practical.
- Isolation: a way to disconnect the battery safely.
- Cable routing and mechanical protection: keep cables away from heat, sharp edges and moving parts, use grommets and conduit, and secure them along the run.
- Suitable connections: correctly sized lugs, a proper crimper and heat shrink, with terminals tightened to the maker's specification.
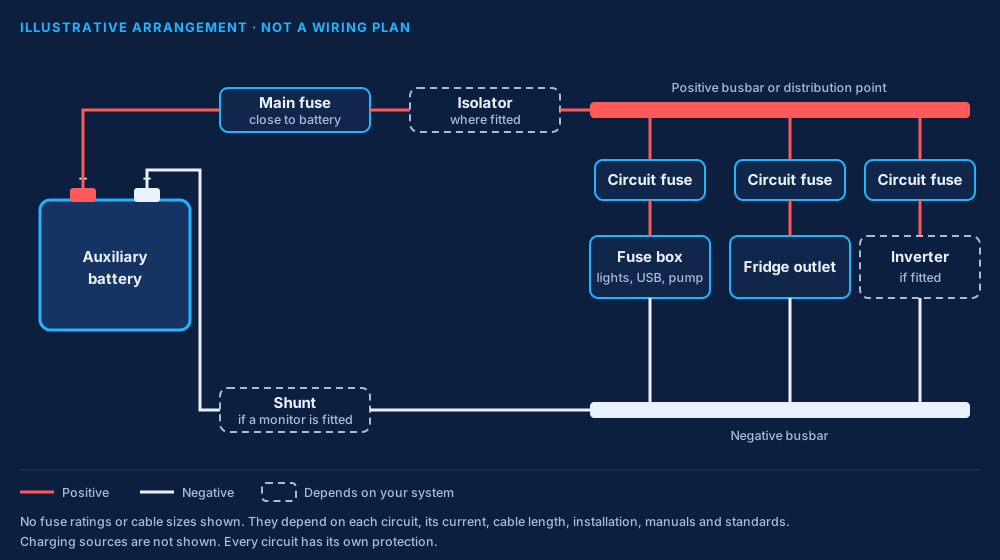
We don't publish one-size-fits-all cable or fuse charts. The right sizes depend on the actual circuit, the current, the cable length, how and where the cable is installed, your equipment manuals, and the applicable standards. The 12V Cable and Fuse Size Guide shows you how to work it out, and the Dual Battery Wiring Diagram for a 4WD shows a typical layout.
Calculate and size the system
← Back to TopicsUse this as a starting point only. Always check your equipment manuals and real measurements.
- Energy usewatts × hours = Wh per dayAdd up every appliance.
- Battery capacityWh ÷ about 12V = Ah per dayTimes days without charging, allowing for usable capacity.
- Chargingput back ≥ daily useAlternator, solar and mains, with some margin.
- Runtimeusable Ah ÷ Ah per day = daysA rough guide to how long you can last.
- Daily energy use: for each item, multiply its watts by the hours it runs per day to get watt-hours (Wh). Add them up. Fridges cycle on and off, so use the maker's daily energy figure if it has one.
- Battery capacity: divide your daily watt-hours by the battery voltage (about 12V) to get amp-hours (Ah) per day. Multiply by the number of days you want to last without charging, then allow for how deeply your battery type can be discharged. See Lithium vs AGM Battery for Camping.
- Charging: your charging sources need to put back at least what you use each day, with some margin. See What Size DC-DC Charger Do I Need?
- Solar contribution: depends on panel size, season, location, shading and panel angle. Real output is usually well below the panel's rated watts. See Solar Panels.
- Inverter size: must handle the total watts of the AC appliances running at the same time, plus any start-up surge. Check each appliance's label.
Coming later: energy use, battery size and solar calculators are planned for our Resources page. They are not available yet.
Installation sequence
← Back to TopicsThis is a general overview of the stages, not a wiring procedure. Every vehicle and system is different, so always follow your equipment manuals and vehicle requirements.
- Define your needs: list your appliances and estimate daily energy use.
- Choose your system: battery type and size, charging sources, and any optional parts.
- Plan the layout: mounting locations, cable routes and lengths, fuse locations and isolation.
- Select parts: check they are compatible with each other, your battery and your vehicle.
- Prepare the vehicle: disconnect batteries and make the work area safe.
- Mount and wire: secure all parts, run and protect the cables, fit fuses and make the connections.
- Check before power-up: polarity, tight terminals, correct fuses, and cables secured and protected.
- Commission and test: reconnect, confirm charging from each source, check for heat or voltage drop under load, and confirm the start battery stays separate.
If you're unsure about any stage, have an auto electrician check your work or do the install.
Safety
← Back to Topics- Battery fault current: a battery can deliver enough current in a short circuit to melt cable and start a fire. Treat every battery terminal as live.
- Circuit protection: fit suitable fuses or breakers on every positive cable, as close to the battery as practical.
- Correct polarity: reversed connections can destroy equipment instantly. Check before you connect.
- Secure mounting: batteries and equipment must be firmly mounted so they can't move in a sudden stop or crash.
- Cable protection: protect cables from heat, sharp edges, chafing and moving parts.
- Ventilation: some batteries and chargers need ventilation. Follow the manufacturer's instructions.
- Safe isolation: disconnect batteries before working on the system, and have a way to isolate it quickly.
- 240V AC, shore power and inverter/chargers: any work on 240V AC wiring, including mains inlets, shore-power connections and inverter/charger AC wiring, must be done by a licensed electrician and comply with Australian requirements, including AS/NZS 3000 and the AS/NZS 3001 series for caravans and recreational vehicles where they apply. Plug-in equipment must be used as the manufacturer directs.
- Get qualified help: if you're not confident, have an auto electrician check or complete the work.
Choosing equipment
← Back to Topics Batteries
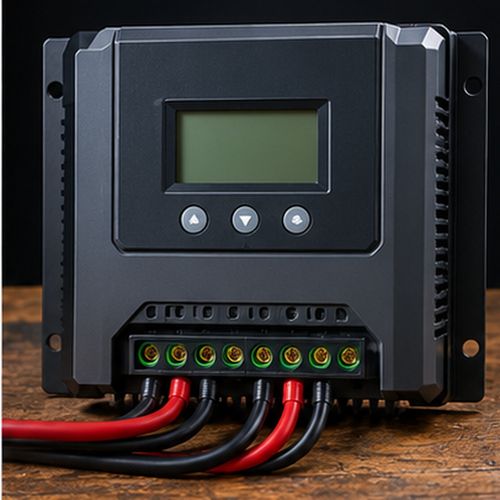 Solar controllers
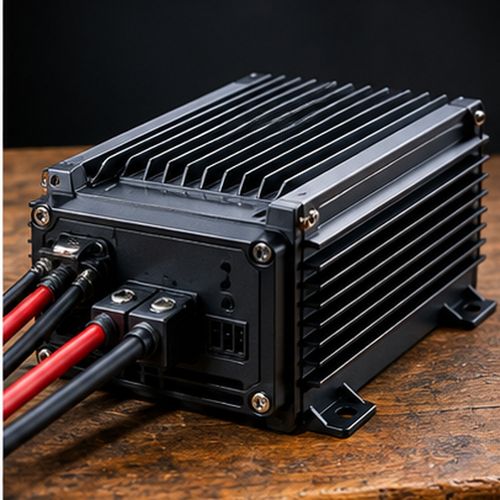 DC-DC chargers
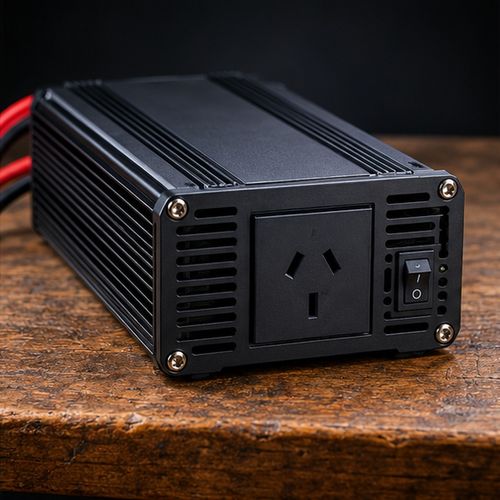 Inverters
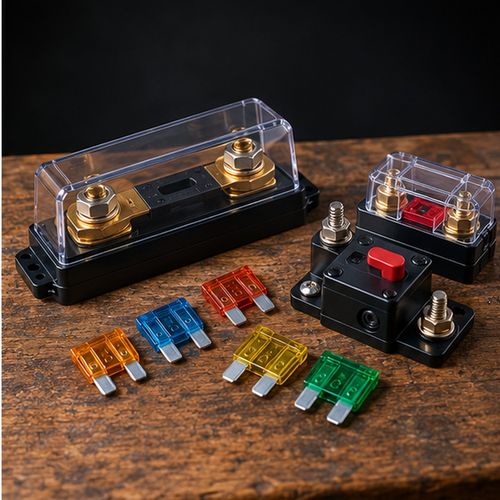 Fuses & breakers
When you compare parts, look at:
- Specifications: voltage, current and capacity ratings that suit your system.
- Compatibility: chargers must suit your battery type, and parts must work with each other and your vehicle (for example smart alternators).
- Reliability: suitable for heat, dust, vibration and water where they'll be mounted, with clear manuals and support.
- Intended use: weekend trips need less than long remote stays.
- Budget: spend where it matters most for safety, like fuses, cable and connections.
Our Gear Picks by category: Battery Picks, DC-DC Charger Picks, Solar Picks, Tool Picks and Power Station Picks. You can also browse the Wired For The Wild Shop.
As an Amazon Associate I earn from qualifying purchases. Prices and availability are shown on Amazon.
Next steps
- Choose your battery: Lithium vs AGM Battery for Camping
- Size your charger: What Size DC-DC Charger Do I Need?
- See a typical layout: Dual Battery Wiring Diagram for a 4WD
- Work out cable and fuses: 12V Cable and Fuse Size Guide
- Decide on solar: Solar Blanket vs Rigid Solar Panel
- Get the right tools: First 12V Install Tool Kit for Beginners
- Fix charging problems: Why Isn't My Caravan Battery Charging?
- Browse everything: All Guides